
Understanding Closed Captioning and Subtitles: Key Differences & Creation Guide
- Introduction to Closed Captions vs. Subtitles
- Differences in Writing Closed Captions vs. Subtitles
- How to Generate Closed Captions
- Best Practices for Ensuring Accessibility and Quality in Closed Captions
Introduction to Closed Captions vs. Subtitles
To start identifying which suits your needs for your videos, closed captioning or subtitles, you can first explore their brief introductions below.
Closed captions are text that matches the audio in a video, making it easier for people who are deaf or hard of hearing to follow along. They don’t just show the spoken words present on the video—they also describe important sounds, like background music or sound effects, and let you know who’s speaking. This helps viewers fully understand what’s happening in the video. The cool thing about closed captions (which is usually denoted by CC) is that you can turn them on or off whenever you want, unlike open captions (also known as burned-in), which are always on the screen and cannot be turned off.
On the other hand, subtitles are text versions of the spoken dialogue in a video, created to help viewers understand content in a language they don’t natively speak. They’re mainly focused on translating the words being said on the video, so they usually don’t include other sounds like sound effects or music descriptions, like closed captions. Subtitles are for those people who can hear the audio but need to break down language barriers. By showing the translated text in sync with the dialogue, they make it easier for people around the world to enjoy watching videos from different countries with different languages.
There you have it! That’s the comprehensive and brief introduction of closed captioning and subtitles. Now, after reading their corresponding introduction, as you can see, although they both enable you to make your video accessible to different audiences, they still serve different purposes. To discover more of their differences, explore this post in the subsequent part below.
Differences in Writing Closed Captions vs. Subtitles
As mentioned earlier, although closed captioning and subtitles make videos accessible to different audiences, they serve different purposes. Now, to discover more of their differences in terms of writing them, explore the list below.
Content:
- Closed Captions: These go beyond just the spoken words. They also include sound effects, background music, and even who’s speaking. This helps viewers who are deaf or hard of hearing to understand the video’s content.
- Subtitles: These are mostly about translating the character’s dialogue on the video. Unlike closed captions, subtitles usually skip other audio present in the video like sound effects or music because they’re meant for people who can hear the audio but need help understanding the language.
Purpose:
- Closed Captions: They make videos accessible to everyone, including people with hearing difficulties. They’re also handy for noisy places or if you just prefer reading along.
- Subtitles: These are all about breaking language barriers. They help viewers who don’t speak the video’s language by translating the dialogue into text they can understand.
Format:
- Closed Captions: They’re timed to match the audio and often include descriptions of non-verbal sounds, like [applause] or [music playing].
- Subtitles: These are usually simpler and shorter, focusing only on translating the spoken words without extra details like sound descriptions. Additionally, they are also translated to multiple languages to provide audiences the option to choose what they prefer.
Upon seeing the content above, which do you think, between closed captioning and subtitles, suits your needs? Well, if you are aiming to break down the language barrier by making a video accessible to different audiences who do not natively speak the language, then go for subtitles. Otherwise, if you are aiming to make your video accessible not only to those who don’t speak the video’s language but also to those who have hearing impairments, then closed captions are a solid choice.
How to Generate Closed Captions
Performing closed captioning operation is a straightforward process that involves a few important steps, from turning audio into text to syncing the captions with your video. Here’s a simple guide showing you how to do it:
1. Transcribe the Audio
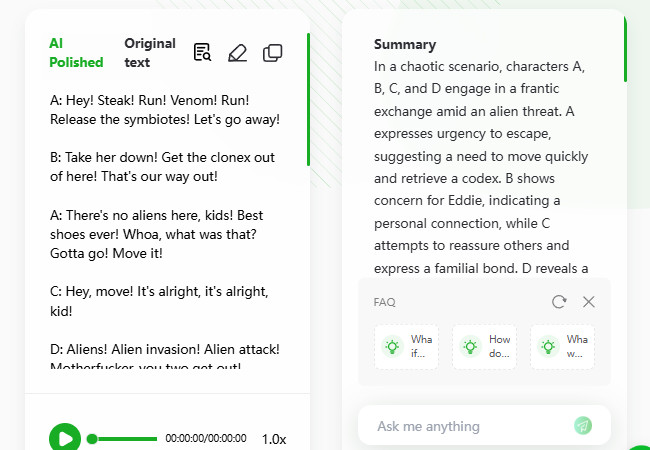
Start by converting the spoken and key sounds into text from the video. You can either type it out manually as you listen or use an AI-powered tool to make the process faster and easier. One of the best tools you can use to transcribe video’s audio is RecCloud AI Speech to Text. This tool leverages advanced speech recognition technology that can accurately recognize and process videos regardless of their language. It quickly turns videos to text and makes the output available to copy and export as a DOCX file.
2. Format the Captions
Once you have the transcript, add timestamps to align the text with the video. Make sure the captions appear at the right time and duration, and include descriptions of non-speech sounds, like [music] or [laughter], to make the content more accessible. You can do this right directly with the tools mentioned earlier.
3. Choose a Captioning Method
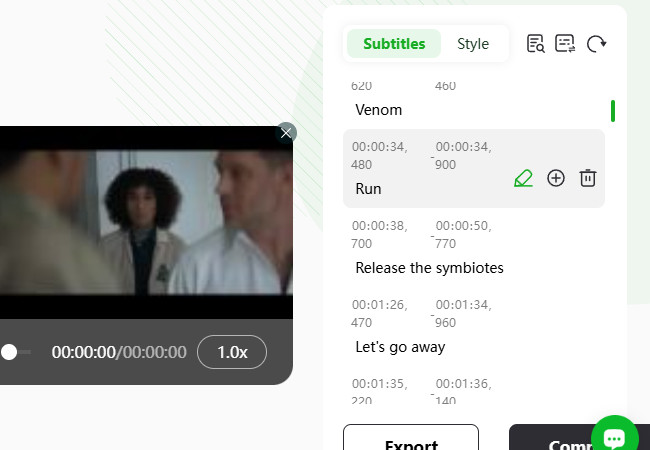
Depending on where you’re sharing your video. You can manually upload a caption file (like SRT or VTT) to platforms such as YouTube or Vimeo. Apart from that, you can use an automatic captioning tool that generates captions and allows you to edit them. One of the professional subtitle or closed caption generator tools you can use is the RecCloud’s AI Subtitle Generator. This tool’s feature can accurately identify your video and generate subtitles with their corresponding timestamps automatically with 99% accuracy. It also lets you edit and manually add sound descriptions to the generated subtitle and export it in SRT format.
4. Review and Edit
Auto-generated captions aren’t always perfect, so take the time to check for mistakes. Fix any errors in spelling, punctuation, or sound descriptions, and make sure speakers are identified if needed.
5. Upload Closed Captions and Enable It
Once your captions are ready, upload them to your video platform and turn on the closed captioning feature. Platforms like YouTube let viewers toggle captions on or off, making your content more inclusive and accessible to everyone.
Best Practices for Ensuring Accessibility and Quality in Closed Captions
There you have it! Those are a comprehensive exploration of closed captioning. Now, closed captions are a game-changer for making videos accessible, whether for viewers who are deaf or hard of hearing, or for those watching without sound. But poorly done closed captions can be frustrating and hard to follow. To make sure your captions are both helpful and high-quality, here are some practical tips to keep in mind:
1. Closed Captions Should be Accurate
Closed captions should match the spoken words exactly. Spelling, grammar, and punctuation matter. Avoid summarizing or rewording unless it’s necessary, as even small mistakes can confuse viewers or change the thought of what’s being said.
2. Ensure Captions in Sync with the Video’s Audio
Closed captions need to appear and disappear exactly when the words are spoken. If they’re out of sync, it can throw off the viewer, especially during fast-paced dialogue, jokes, or moments with dramatic pauses.
3. Add Sound Descriptions
Aside from that, closed captions aren’t just about dialogue, they should also include important sounds and tone that legitimately present on the video. For example, [soft music playing], [loud crash], [whispering], etc. These details help viewers effectively perceive a fuller picture and understand the context.
4. Make Closed Captions Easy to Read
Another practice you should know is that how captions look on screen matters. To keep them clear and readable, you must stick to one or two lines at a time to avoid overwhelming the viewer, use clean, simple fonts, ensure the text stands out against the background, and position captions so they don’t block important parts of the video.
5. Clarify Who’s Speaking in the Video
When multiple people are talking in the video, it’s important to show who’s saying what. You can do this by adding the speaker’s name before their dialogue, using italics for off-screen voices, and incorporating descriptions like [man shouting] or [child laughing] when the speaker isn’t visible.
Conclusion
That’s it! That’s the comprehensive exploration about closed captioning, what it sets apart from subtitles, and how to generate one. Through this post, you can easily identify which one to embed in your video, is it closed captions or subtitles. Additionally, you are also provided with a brief guide on how to generate closed captions! Now, in case you are looking for a tool that can efficiently and accurately generate subtitles and transcripts for closed captions, then the professional RecCloud AI Subtitle Generator is what you are searching for. Visit this tool’s official website to try its powerful features today!


Leave a Comment