
A tutorial video is a great tool to help explain how a certain process is done properly. Since visual aids are easier to understand, many people are now relying on instructional videos that were shared online via different video hosting web pages. However, if you want to create your own video tutorial, then you need a practical tool which can help you to structure educational content in a logical way so that your presentations and exhibiting contents can be expressed effectively. So when making a how-to video, here are some efficient ways you can refer to.
Best Ways to Make Tutorial Video
RecCloud
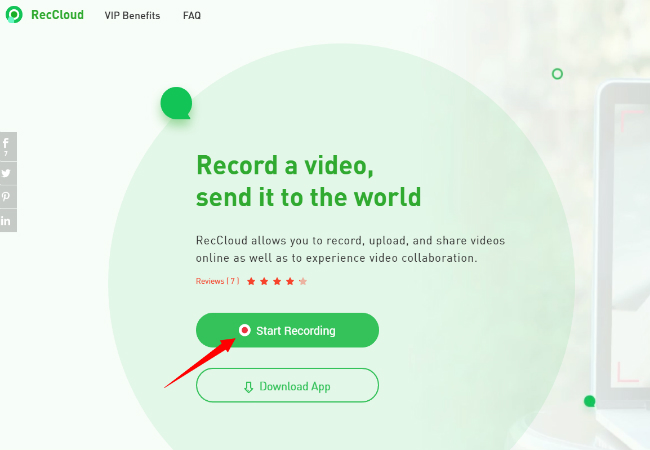
If you are a Windows user and want to know how to make a tutorial video, then RecCloud is a program that you can rely on. This is an online-based tool which is equipped with a screen recording function that is perfect for gathering content for your tutorial. Before recording, you can set your audio input and include the microphone so that your voice will be recorded as you are delivering the tutorial.

And if you want to know how to make tutorial videos for YouTube, RecCloud also has an annotating function which provides you with markings and helps you to emphasize certain parts of the screen where you want the audience to focus on. And if you want to incorporate yourself into the video, a webcam can be added into the recording, and then your image will show up in the video as well. After recording, you can opt to keep the recordings on your hard drive, or upload them to RecCloud’s cloud storage where you can share the recorded videos directly to numerous social media platforms. Here’s how to make a tutorial video with this app:
- Visit RecCloud’s official page.
- Click “Start Recording” to launch the recorder. And if this is the first time you are using it, then an online launcher will need to be installed.
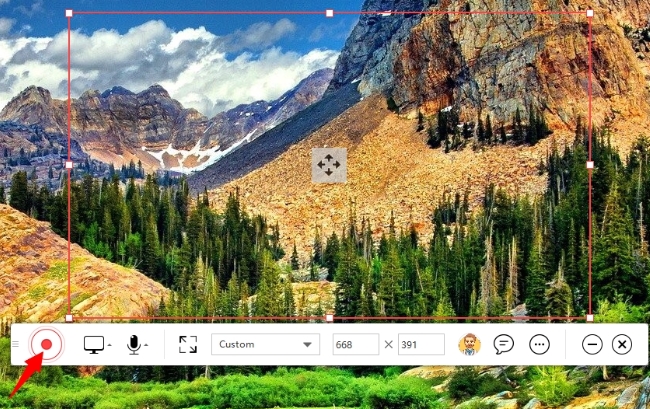
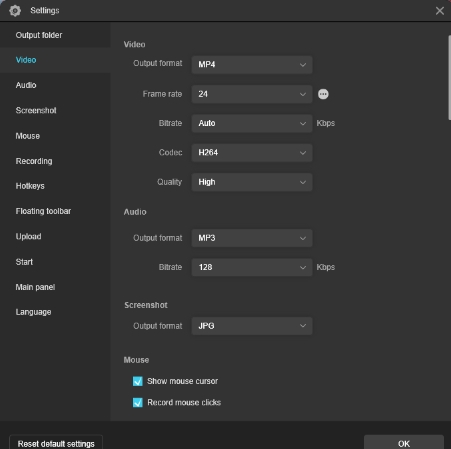
- After that, go to “Options” and set your recording configurations such as the video and audio quality, hotkeys, video formats, the output folder, and so much more. Meanwhile, make sure to select the plugged-in microphone as your audio input from the settings so as to capture the microphone sound. For more instructions on sound recording, you can check out how to record audio on RecCloud.
- Next is to set the recording frame for the portion of the screen that you will be working on by hitting the “Regional” recording mode.
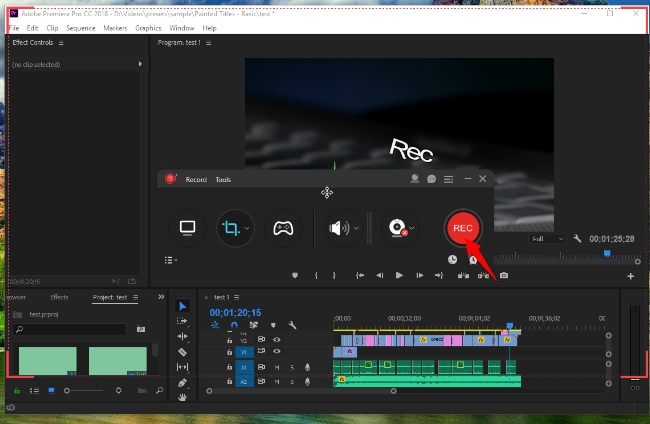
- Then, click “Record” button to initiate the recording.
- Now you can start the step-by-step procedure for your tutorial. During the recording, you can click the pen-like icon to enable the annotation tool for adding arrows, lines, serial numbers or a whiteboard, etc.
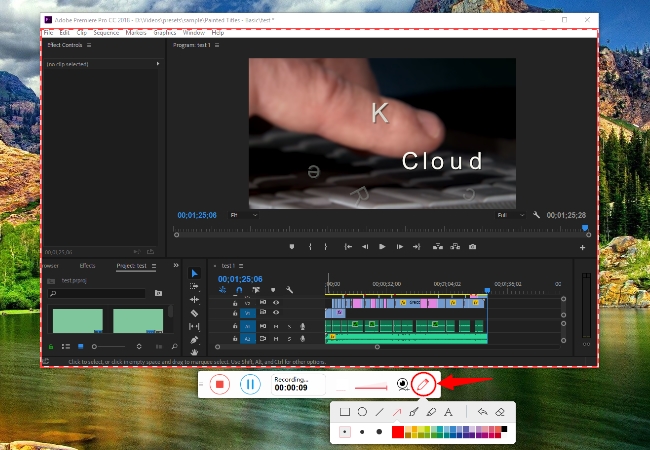
- And to activate the webcam recording, simply hit the webcam icon from the recording toolbar and choose the plugged-in camera device’s name.
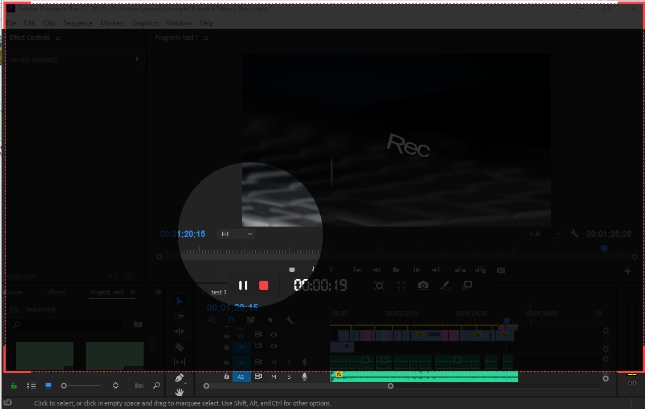
- Once finished with the video, click “Stop” and a preview of the video will appear. In the preview, you will be given an option to trim the video length by moving the sliders right or left.
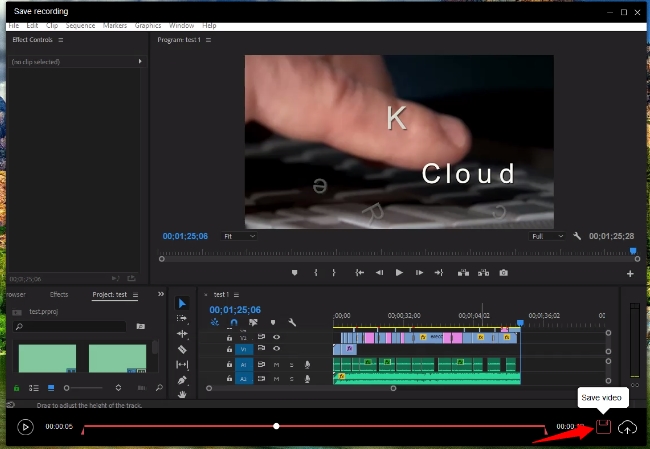
- As for saving the recorded clip, you can save it to a local disk on your PC, or upload it onto the cloud storage. For video uploading, you will immediately get a video link once the uploading is finished so that you can quickly share the tutorial to the group you want.


Tips: For Mac users who want to learn how to create an online course, this program is also available for Mac OS devices. The functions of RecCloud on Mac are exactly the same as on PC. And if you prefer learning more about recording skills on Macbook, the second tool shown below can be a great option as well!
ApowerREC
For Mac enthusiasts who are interested in knowing how to make an instructional video with screen recording, the answer is to use this multifunctional program called ApowerREC. This tool is compatible with the latest Mac OS system and supports various output video formats. In the course of using ApowerREC, you will be given different recording modes which include full screen recording, regional recording, zoom recording, spotlight recording or audio recording only. The high quality of both the screen and audio recording is indeed perfect for instructional videos. Plus, its integrated annotation tool is beneficial for marking points directly on the screen. What’s more, a webcam image can also be captured independently from the recorder’s main board.

Moreover, this screen recording application has other useful features which can help to improve your recording experience. For example, its “Task Scheduler” allows you to schedule a certain time to start the recording with or without your presence. While its “Auto Stop” function will instantly end the recording at a certain time that you set.
When the tutorial is over, the recorded file can then be accessed from the video list panel. The shortcut icon of editing, previewing, and compressing functions are also available at the bottom left corner of the list panel so as to offer quicker and more effective access to these functions. And if you right click the independent video file, you can also preview, delete, edit the videos or upload them to different social media websites.
Check out the following steps on how to make educational videos:
- Download and install ApowerREC.
- Launch the program and enter “Settings” to adjust the recording configurations, such as frame rate, bit-rate, recording mode, audio settings, output directory or hot-keys and so forth.
- To record the audio, please make sure to select the default system sound on your PC and the plugged-in microphone device under sound options.
- Next, choose your desired recording area and click “REC” to begin the recording.
- For tutorial video making, it’s essential to make your explanation and screen exhibition as detailed as possible. Therefore, using the tool’s “Spotlight” function will allow you to focus on a certain portion as you go with your demo.
- To add camera image, just click the webcam icon from the recording tool bar and select your webcam device is alright.
- Once the tutorial is finished, hit “Stop” button to end the recording and the recorded file will automatically saved to the video list panel where you can start to preview, compress, upload or delete.


Summary
To sum up, both applications are great in terms of making video tutorials, the difference being that they run on different platforms and have added functions unique to each one. They are indeed must-have programs when making tutorial videos.
Leave a Comment